Hi, welcome to part three of our run down of all the Warlord special rules. Here are parts one and two, with part one including an overview of what special rules are and how they trigger.
Let’s get started:
Aeldari
Fuelled by their mastery over the souls of the dead, Aeldari Warlord special rules go off when any card on the battlefield is destroyed, whether the card was yours or your opponent’s. Each time that happens, all of your cards which are currently deployed to the battlefield get a boost to one of their stats (which stat is boosted depends on your Warlord).
Naturally, this means your cards can get more boosts when fighting against large enemy decks (as there are more cards to die), and you can add to this by making your own deck large (your cards dying triggers the special rule, too).
However, remember that unlike the Tyranid family of special rules, only Aeldari cards present on the battlefield are boosted when this triggers. This means you probably want a couple of tough cards in your deck, so they survive long enough to use all those upgrades.
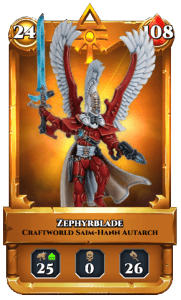
I like using Kyarna, the Wraithguard, or the Talos Pain Engine, Deliquescence with the Aeldari Warlord, Zephyrblade – because their high ranged attack keeps going up as more and more cards die, and they have enough Wounds to stick around. If you pair them with cheaper cards whose role is to hit the enemy and then get wiped out, your tougher cards can get boost after boost.
Combine this with a deck which can build up a large ranged attack boost (by using melee or psychic attacks) plus some careful timing and you can deliver an extremely powerful ranged attack.
Tyranids
The Tyranid hive fleets evolve at an incredible rate, their threat steadily escalating until no enemy can stand before them. To represent this, the Tyranid family of special rules increases one of your card’s stats each turn that the battle continues.
Therefore you want the battle to last as long as possible, either through deploying a mass of cheap cards or cards with enough Wounds to survive enemy attacks. I’d say both of these approaches work about as well, but each has a downside you need to mitigate:
With high Wound cards every enemy attack hurts, meaning if an enemy card can put out a huge amount of damage your big monster is going to take it all, and may not survive as long as you thought. However, at least your card is attacking back until it’s destroyed, so you may be able to take out the enemy threat.
But with a horde of cheap cards those massive damage attacks are less effective (because once your card is destroyed any excess Wounds are wasted). This means you can keep a scary enemy card tied up and wasting its potential, but with the downside that if your cards keep being destroyed they never get to attack back.
Finally, you also need to consider building up a high attack bonus ready for when your Warlord arrives, to combo with the attack stat they’ve been gradually increasing while in your deck. This requires timing and potentially sacrificing one of your own cards (or bringing your Warlord out early) to ensure your boosted attack hits the target you want.
Conclusion
Thanks for reading. Hopefully these posts are proving useful, both to clarify some of the weird ‘special rules stuff’ which happens during battles (don’t worry, we’re working on improving the feedback the special rules give), and to provide some ideas of how to build decks around specific Warlords.
We use cookies to optimize our website and our service.
Functional
Always active
The technical storage or access is strictly necessary for the legitimate purpose of enabling the use of a specific service explicitly requested by the subscriber or user, or for the sole purpose of carrying out the transmission of a communication over an electronic communications network.
Preferences
The technical storage or access is necessary for the legitimate purpose of storing preferences that are not requested by the subscriber or user.
Statistics
The technical storage or access that is used exclusively for statistical purposes.The technical storage or access that is used exclusively for anonymous statistical purposes. Without a subpoena, voluntary compliance on the part of your Internet Service Provider, or additional records from a third party, information stored or retrieved for this purpose alone cannot usually be used to identify you.
Marketing
The technical storage or access is required to create user profiles to send advertising, or to track the user on a website or across several websites for similar marketing purposes.


Recent Comments